
Install Plugin
To install the plugin simply upload the complete .zip file as follows:-
- log-in to your WordPress admin area
- click on Plugins/Add New
- click the ‘Upload Plugin’ button at the top of the screen
- click the ‘Browse’ button, and locate the .zip file on your computer
- click ‘Install Now’
- activate the plugin as normal
Setting Up The Plugin
All you need to do now is upload the images you are going to use (see our FAQ page for tips on easily finding great images to use).
This is done using the standard WordPress Media Manager, so if you already have suitable images uploaded you can simply select them instead. Or a combination of the two.
1. Click on Settings/Random Featured Image
2. Click on the Upload/Select Images button
3. Using the standard Media Manager upload or choose all the images to use (you can do them all in one go):-
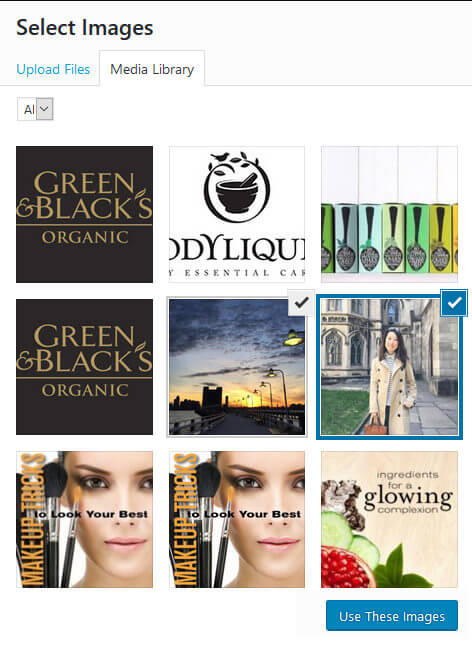
Just click ‘Use These Images’ when you’re done.
4. Click ‘Save Settings’ and you’re done.
That’s all there is to setting things up. You can now forget about featured images as a random one will be allocated every time a post without one is published.
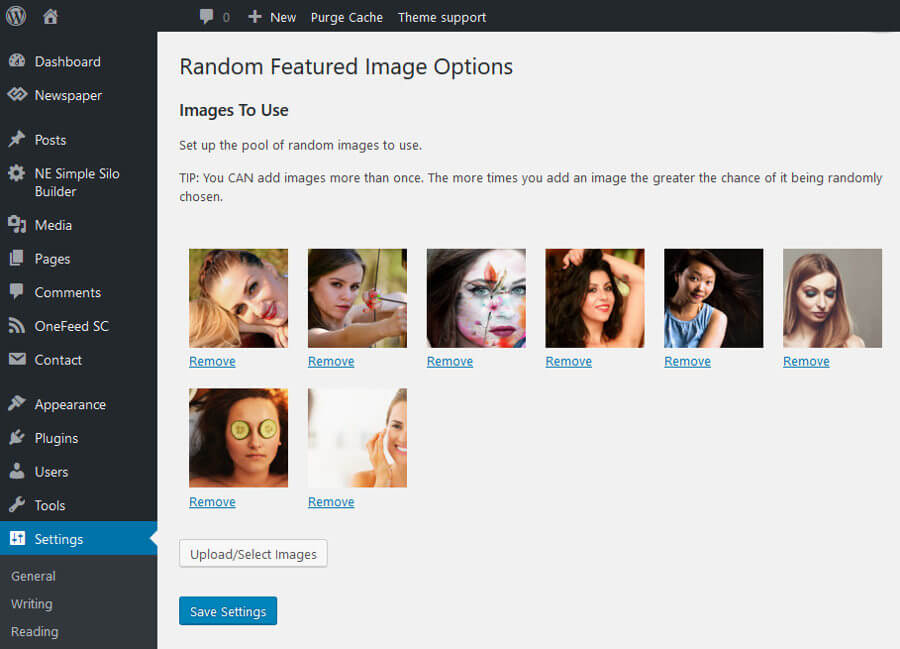
Changing The Pool Of Images
To change the images that are being randomly used, just go back into Settings/Random Featured Image. You will see thumbnail size images of everything currently available to the plugin.
To stop the plugin using an image again, simply click on the ‘Remove’ link below the relevant image. NOTE: this will not affect any of your posts, it will simply stop it being used by any other posts in future.
To add more images, just go through the ‘Upload/Select images’ button again. All images you select or upload now will be added to the existing pool of images.